
Image in latex are a vital part of many professional documents. These could be photos, graphs, charts, or figures that add value to the content they are accompanying. The good news is that LaTeX offers many options for inserting figures and pictures into documents. This guide will teach you how to insert an image in LaTeX as well as how to shrink, rotate, and position them.
Table of Contents
Importing a Picture
Adding an image in LaTeX is a relatively straightforward process. However, you should be familiar with the packages and commands needed to do this properly.
An example of the code needed to import a picture into your LaTeX document is shown below:
\documentclass{article}
\usepackage{graphicx}
\graphicspath{ {./images/} }

\begin{document}
This is a simple example of a picture inserted into a LaTeX document.

\includegraphics{teacup}

There is a picture of a teacup above
\end{document}

Note that the above example includes the command \usepackage{graphicx}. LaTeX cannot manage images on its own and needs to use the graphicx package. This package builds onto the stock graphics package and offers a very useful interface for working with images.
The command \graphicspath{ {./images/} } informs LaTeX that the images used are stored in a folder called images within the main document’s directory.
The command \includegraphics{teacup} tells LaTeX to include the image file teacup.png in the document. Note that this command omits the file’s extension.
Using High Resolution and Low Resolution Image in LaTeX
In the above example, we omitted the image file extension from the command \includegraphics{teacup}. This isn’t always necessary, as you can include the file extension in certain situations. Omitting the file extension causes LaTeX to search for all supported image formats within the directory mentioned. It searches for each extension in a particular order, which users can also modify.
Why would you want to include the file extension in the above command? The main reason is that it allows you to switch between a development environment and a production environment easily.
It is generally better to use the development environment when your document is still in progress. This environment uses a low-resolution version of your image. The benefit of using a low-resolution image is that it allows for faster compilation when previewing your document.
You can use a high resolution version of your image in LaTeX in the production environment. This is when your document is complete and is ready to be produced.
For example, let’s say you have two versions of your image, teacup.pdf and teacup.png. The pdf version is the high resolution image while the png version is the low resolution image. You can then use the command \DeclareGraphicsExtensions{.png,.pdf} to the .png version when developing your report. This command will also use the .pdf version in the event that your .png version is missing.
After you have developed your report,you can use your high-resolution .pdf version of the image using the command \DeclareGraphicsExtensions{.pdf,.png} .
Generating a Low Resolution .png Image From a .pdf Image
It is also possible to have LaTeX generate a low-resolution .png version of your image from a .pdf image automatically while compiling your document. This is possible by using the following code after the \usepackage{graphicx} command:
\usepackage{epstopdf}
  \epstopdfDeclareGraphicsRule{.pdf}{png}{.png}{convert #1 \OutputFile}
  \DeclareGraphicsExtensions{.png,.pdf}
If your teacup.pdf image exists but teacup.png doesn’t, the above code will create a file titled teacup-pdf-converted-to.png will be created and loaded into your document.
In above code, the command convert#1 takes care of the conversion process. Note that LaTeX will need to use the package epstopdf to perform this conversion. When completing the final production version of your document, you must include the command \epstopdfDeclareGraphicsRule to ensure only the high-resolution PDF version is used.
Understanding the Image Folder Path
If you intend to include multiple images in your document, you may need to keep them in separate folders. This can help keep your project organized while completing your document.
Using Relative Paths
You can tell LaTeX to look for images in your images folder using the command \graphicspath{ {images/}. This image in the LaTeX path is relative to the directory you are currently working in. Therefore, the compiler will seek out the file within the same folder that the code for the image is included in.
Using Absolute Paths
It is also possible to use an absolute path where your file’s exact location is specified. This can be useful when you are working with a local installation of LaTeX on your computer. The absolute path in Windows format will resemble \graphicspath{ {c:/user/images/} }
On Linux and MacOS devices, this absolute path should resemble \graphicspath{ {/home/user/images/} }
Using Multiple Paths
If your images are saved in multiple folders, you can use a special command to import them. For example, let’s say you have two folders called imagefolder1 and imagefolder2. You can use the command \graphicspath{ {./imagefolder1/}{./imagefolder2/} }
Resizing Your Image
LaTeX offers many options for importing your image. For example, you can add an image in LaTeX and specify the dimensions such as length and height before the image is imported. This is illustrated in the following code example:
\begin{document}
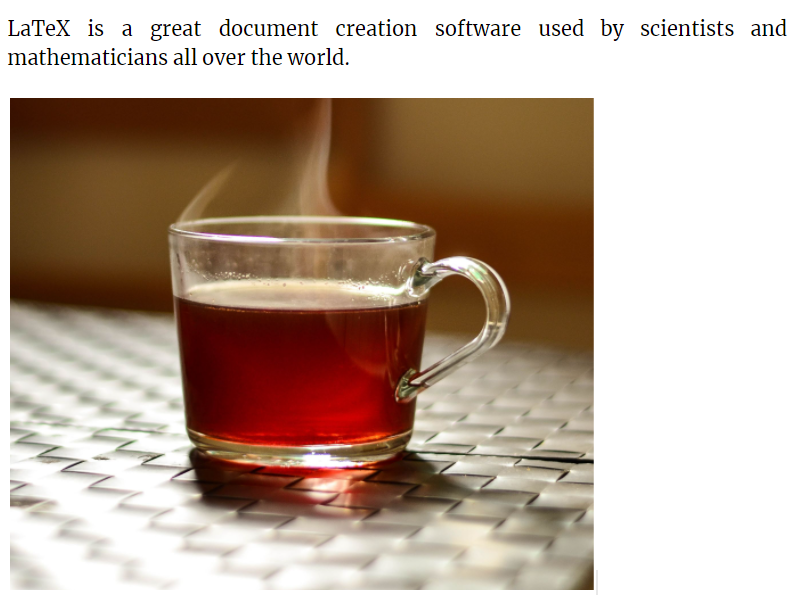
LaTeX is a great document creation software used by scientists and mathematicians all over the world.
\includegraphics[scale=2]{teacup}
In the above example, the command \includegraphics[scale=2]{teacup} added the teacup image into the document. The parameter scale=2 scaled up the image to twice its original size.
Specifying Image Height and Width
In some situations you may prefer to specify the exact dimensions you would like your image in LaTeX to fit. We illustrate this in the following example:
\begin{document}
LaTeX is a great document creation software used by scientists and mathematicians all over the world.
\includegraphics[width=6cm, height=3cm]{teacup}

In the above example, the dimensions are specified in centimeters. However, it is possible to specify the dimensions in different units. The following list explains the abbreviations for different units:
- pt: Point refers to the default length unit, which is around 0.3515mm.
- mm: millimetre
- cm: centimetre
- in: inch
- ex: Refers to the height of an x using the current font.
- em: Refers to the width of an m using the current font
Setting Image Dimensions Relative to Document Elements
In some cases you may need to set your image in LaTeX dimensions according to the size of your other document elements such as your text. We illustrate how to do this in the following example:
\begin{document}
It is possible to set your image width to be the same as your text width by following the above code.
\includegraphics[width=\textwidth]{teacup}

You can also set the image in LaTeX size to match other LaTeX document elements. Some of these are shown below along with their corresponding abbreviations.
- \columnwidth: Refers to the width of your document’s column
- \linewidth: Refers to the width of the line within the current environment
- \paperwidth: Refers to your page width
Rotating Images
LaTeX can also rotate images when inserting them. This is illustrated in the following example:
\begin{document}
You can rotate images easily in LaTeX.
\includegraphics[scale=1, angle=45]{teacup}
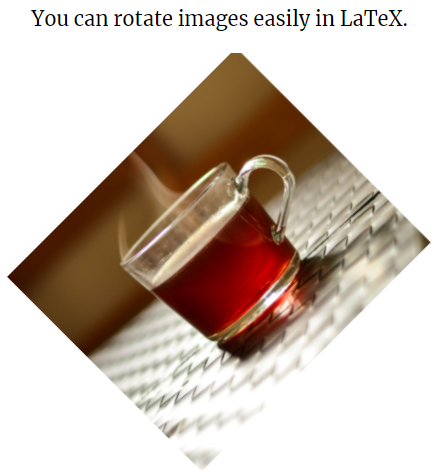
In the above example, we used the parameter angle=45 to rotate the image in LaTeX counterclockwise by 45o. You can also rotate your images clockwise by setting the degrees in negative.
Positioning Your Image
LaTeX offers many options for positioning your image. This can be accomplished by introducing a new environment as shown in the following example:
The image will be added beneath this text.
\begin{figure}[h]
\includegraphics[width=6cm]{teacup}
\end{figure}

In the above code, \begin{figure}[h] specifies to position the image in LaTeX “here” via the “h” parameter. Some other parameters for positioning your image in LaTeX include:
t: Adding figure to top of the page.
b: Adding figure to bottom of the page.
Captioning Your Image
LaTeX also allows you to caption your image easily using the command \caption{Your caption}. Your caption position will change depending on where it is in relation to the command \includegraphics. For example, placing the command above \includegraphics places the caption above the image.
Final Thoughts
As you can see, there are numerous ways to add images and alter them to your liking in LaTeX. The aforementioned guide can help you insert your preferred images quickly and have them looking professional with only a few commands.
Frequently Asked Questions
Some frequently asked questions about adding image in LaTeX are shown below:
Q1. How Do I Insert a Picture Into LaTeX?
You can add a picture into your LaTeX document using the command \includegraphics{} where your image file name is included between {}.
Q2. How Do You Insert an Image in LaTeX Overleaf?
You can insert an image in LaTeX Overleaf using the following steps:
Click the upload icon in the upper left corner of the editor.
Drag and drop your files into the dialogue box that pops up
Alternatively, click Select file(s) and open the file browser before navigating to your image.
Your image files will now appear in the left panel.
Q3. How Do I Scale Up an Image in LaTeX?
You can scale an image up or down using the command \includegraphics[scale=x]{filename} where “x” is the scale ratio and “filename” is the name of your image file.
Further Reading
LaTex Tutorial
- 27 Pros and Cons of Using LaTex for Scientific Writing
- 6 easy steps to create your first Latex document examples
- How to add circuit diagrams in Latex
- How to change Latex font and font size
- How to create a Latex table of contents
- How to create footnotes in LaTeX and how to refer to them, using the builtin commands
- How to create Glossaries in LaTeX
- How to create plots in Latex – codes and examples
- How to create symbols in LaTeX – commands for Latex greek alphabet
- How to create tables in LaTeX – rows, columns, pages and landscape tables
- How to drawing graphs in Latex – vector graphics with tikz
- How to highlight source code in LaTeX
- How to Itemize and Number List – Adding Latex Bullet Points
- How to make hyperlink in latex – Clickable links
- How to reference in Latex – 5 steps to bibliography with Bibtex
- How to use Latex Packages with examples
- How to use LaTeX paragraphs and sections
- LaTeX Installation Guide – Easy to follow steps to install LaTex
- Learn to typeset and align Latex equations and math