Looking for science communication tools to help you make a bigger impact? You have come to the right place.
| TLDR •🦸Use MeetGeek to free yourself from taking meeting notes or debriefing others •📹Use Loom to create explainer videos to remove the need for meeting altogether •💡Use Jasper to get unstuck – ask it to brainstorm or write an outline for you •✍️ Use ProWritingAid or Trinka to check and edit your paper •📖 Use QuillBot to rephrase or summarize your research |
“If you can’t explain it simply, you don’t understand it well enough.”
Albert Einstein
In case you might be wondering why you should care other than your own understanding. Let me paraphrase Tony Robbins’ quote from Unlimited Power: “The quality of your researcher life is the quality of your science communication.” (the italics are mine)
Communication is a key component of any successful researcher and scientist.
It pays to be a good science communicator.
Just look at Neil deGrasse Tyson, a postdoctoral research associate at Princeton University who rose to fame and fortune with science.
Best Conservation Of Energy in action. Neil deGrasse Tyson has a remarkable ability to communicate complex scientific ideas to a mainstream audience.
If I finally have your attention, then let me be clear: great scientists do NOT need to be popular.
In fact, if your objectives are personal fame and fortune, you will likely have a hard time becoming a good communicator. Because great communicators know how to promote and represent the common good.
This blog post covers a process of nine steps to help researchers with science communication. And, we suggested tools that we have used and considered valuable to help researchers with real-life examples.
Let’s go.
Table of Contents
Phase I. Planning
Step 1. Review existing assets and draw connections and new ideas
Any good scientist knows that communication is key, especially when it comes to sharing their work with the public. However, crafting an effective message can be a challenge, and it’s important to prepare carefully before heading into a conversation.
One of the first steps is to review existing works, identify unmet needs, and understand your own research assets and draw connections and new ideas.
This means conducting research on existing academic papers on a topic as well as your own research projects. And, you want to communicate how your research adds to the previous work.
Effective researchers identify the audience’s interests, needs and determine what data is most important to share. Effective researchers also strive to develop a clear and concise message that will resonate with the audience.
It’s also important to note that The Medium is the Content. Science communication can take many forms. More researchers are turning to social media such as Twitter, YouTube, Facebook to communicate their findings and connect with other researchers in addition to the other academic network sites.
Some platforms such as Facebook groups or Quora can help researchers share resources and communicate insights with new audiences and participants interested in the same niche.
Tools to help: Scapple (Next Generation Mind-mapper)
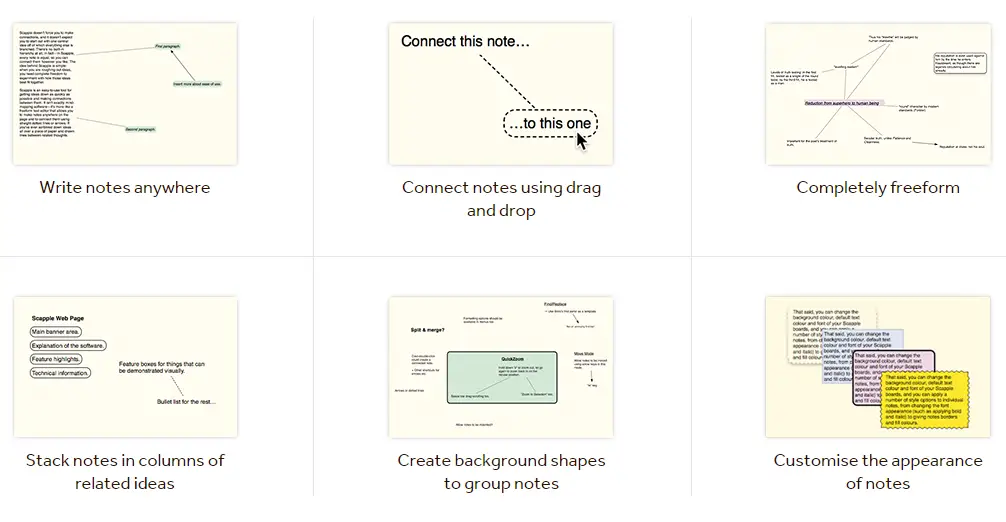
A mapping tool like Scapple can be incredibly useful to help you communicate the key points from your research projects. What makes Scapple stand out is it allows you to drag and drop documents onto a canvas, making it easy to connect the dots and develop new ideas.
This can help you map out the key ideas for clear and concise research communication that will resonate with your audience.
Step 2. Begin with the end in mind with a research blueprint
Any good scientist knows that the key to a successful experiment is careful planning and attention to detail. The same can be said of communicating your research to a non-scientific audience.
Before you start writing or speaking about your work, it is important to take some time to think about your goals and how best to achieve them.
- What do you want your audience to take away from your scientific research?
- What channels are you spreading your scientific knowledge?
- What kind of language and what forms will they understand?
- What style of communication will engage them?
By taking the time to answer these questions, you can develop a research blueprint that will help ensure your science communication is clear, concise, and effective.
Note it’s easy to spread yourself too thin on social media. Many science communicators find better success when promoting the common good for society rather than focusing on their own success.
In short, to effectively communicate an idea or insight, scientists should start with the end game – what they are trying to achieve and how would they know whether they have succeeded.
Tools to help – Scrivener (Digital Binder for Massive Manuscript)
Here we are assuming you are working on a manuscript for your next research.
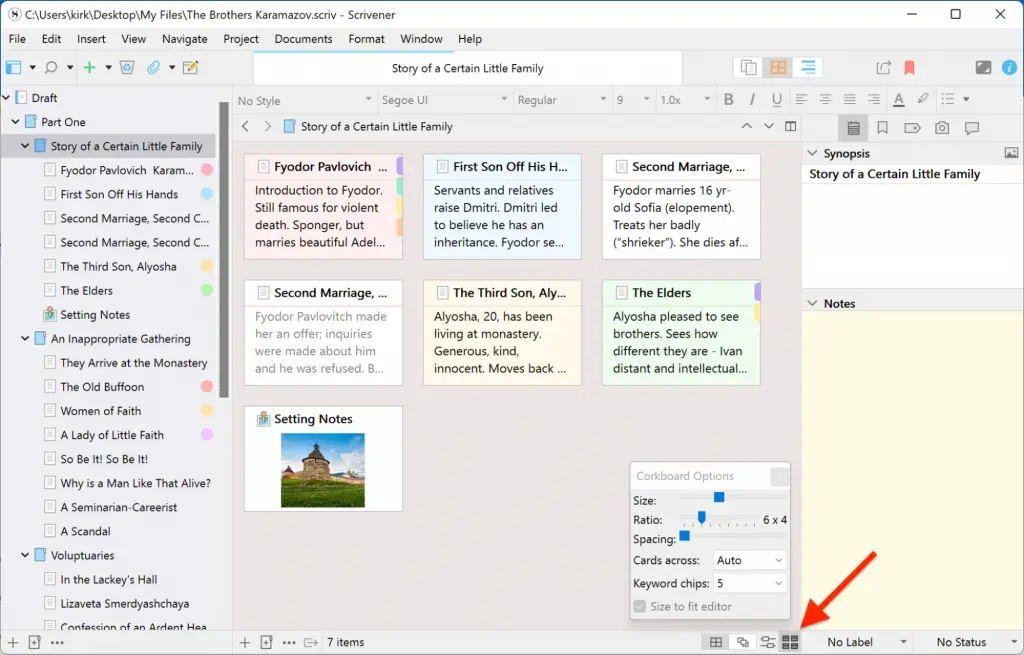
Scrivener makes it easy to rearrange sections of your manuscript, making it a powerful tool for outlining your thoughts. With Scrivener, you can create a blueprint for your communication that will help you achieve your goals.
Here are the main reasons we like it as a tool for science communication.
- Like a ring-binder, Scrivener allows you to easily switch between sections of your work, notes, and references. Divide your writing into digestible chunks and let Scrivener join them. Integrated outlining tools allow you to plan ahead or reorganize. And Scrivener will develop with your project.
- Dots-Connector. Instantly switch between editing your document section by section and as a whole. Working on a big document is simpler when broken up into tiny chunks, and Scrivener allows you to do just that.
- Corkboard. The corkboard is a writer’s favorite planning tool. Previously, moving index cards on the board required rearranging the sections represented by those cards in your document.
- Outliner. Create a detailed outline of your research writing with Scrivener. The outliner, like the corkboard, enables you to work with an overview of a chapter, portion, or even your full manuscript—but with additional information.
Below is a video on how to use Scrivener and its Corkboard
Step 3. Set strategic milestones and tactical to-dos
Now that you know your audience and what you want to achieve, it’s time to set some goals. This step is all about figuring out what you need to do to make your communication plans a reality.
To do this, you’ll need to set both strategic milestones and tactical to-dos. Strategic milestones are the big-picture goals that you want to achieve, while tactical to-dos are the smaller steps that will help you get there.
By breaking down your goals into tangible steps, you can make your science communication more effective and achievable.
It’s important to keep your endgame in mind (in step 2), so you don’t miss the forest for the trees.
Tools to help – Asana, Trello, Todoist (Task and Project Manager)
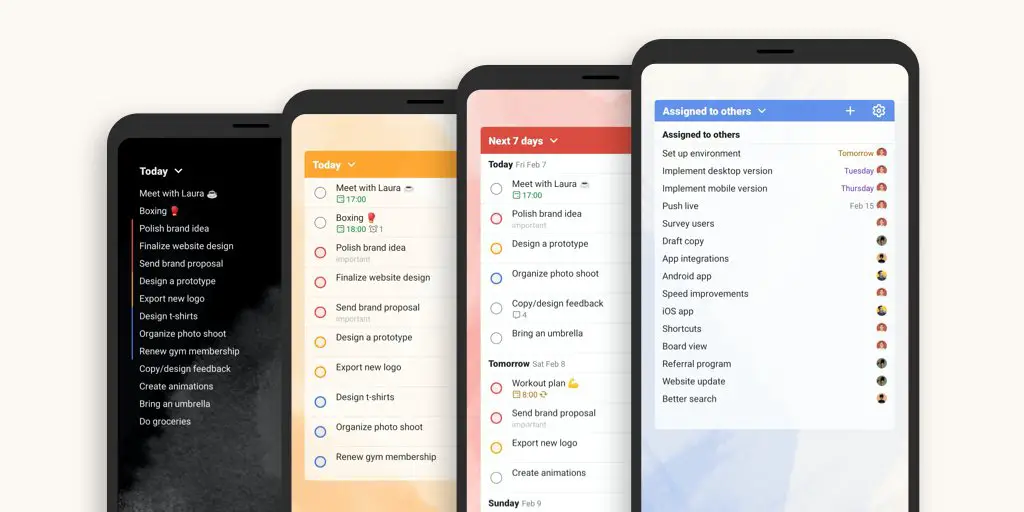
Using a project management tool like Asana, Trello, or a to-do list tool like Todoist can help you to track your progress and ensure that you are taking the necessary steps to achieve your communication goals.
By keeping track of your milestones and to-dos, you can make sure that you are on track and avoid getting overwhelmed.
We mentioned these three tools for managing a project because they each specialize in the different visual presentations of tasks. Todoist is more tactical as it focuses on lists, Trello is more visual with the use of a board, and Asana is something in between.
Todoist is free for Starters with 5 Projects and 5 MB upload. This should be enough for you to create a research project-specific to-do list for yourself or your team.
Conduct your own sampling before committing. I have used all three but I can’t say I’m more in love with one or the other with respect to a project management tool.
Phase II. Execution
Step 4. Create a brief and outline for content creation
Now that you have your list of target audiences and your science communication objectives, it’s time to start thinking about what you’re actually going to say.
This is where creating a content outline comes in. A content outline is a tool that will help you organize your thoughts and ensure that your final product is cohesive and on-point.
To create a content outline, build upon the key points you brainstormed in step 1 and your research on what you want to cover. Once you have a comprehensive list, begin grouping related ideas together and assigning each group a heading.
Finally, flesh out each section with more specific information and subheadings as needed. By taking the time to map out your content ahead of time, you can save yourself a lot of headaches down the road.
Tools to help – Jasper.ai (AI Writer on Demand)
Jasper is a clever AI that can help you with your science communication and writing. You can ask Jasper to create content ideas, provide an outline, create a title, and even write the article for you.
If you don’t know how to adjust your science communication to your audience, simply ask Jasper to write it for you with a command like “write about [research topic A] for [audience B] in the tone of [voice C]. The voice/tone is optional.
Or, sometimes you are just stuck, you can simply ask Jasper.AI the question that you are working on. Simply type in what you need help with and it will give you suggestions.
What impresses me more is the team behind Jasper is constantly improving the tool., e.g., they just added “paragraph generator” in March 2022.
We have a deal for our readers to get 10,000 words for free. You can grab it here.
If you want to know more about Jasper.AI, we have written about it as one of the best writing tools here and tested it here.
Step 5. Choose the right format for your message
Now that you have your outline, it’s time to decide how you’re going to communicate your message. Will you be writing an article, giving a presentation, or creating a video? The format that you choose should be based on your audience, your goals, and the resources that you have available.
For example, if you’re trying to reach a wide audience with a complex message, a video might be the best option. If you’re trying to build relationships with key decision-makers, a face-to-face meeting might be your best bet.
Or, maybe you are just creating some memes or Gifs.
By choosing the right format for your message, you can ensure that your science communication is as effective as possible.
Tools to help – Loom (Video Communication Made Easy)
Loom is a video creation tool that makes it easy to create high-quality videos without needing any editing or uploading experience. With Loom, you can record your screen and webcam simultaneously, making it the perfect tool for creating walkthroughs or tutorials. Loom also offers a wide range of customization options, so you can create videos that are tailored to your specific needs.
If you’re looking for a way to easily create high-quality videos, Loom is a great option.
We have been using Loom since 2021. We use Loom to help clarify an issue or question we have that requires visual aids. For researchers, you can record a Loom video to do a research presentation dry-run against your presentation. Send it to your mentors or peers to evaluate your performance.
Or, better yet, share the research presentation video to a few audience members and ask them to help you find the most interesting points they want you to talk about.
There is no need to edit and upload it to YouTube.
NO edit. NO upload. I repeat.
Simply share the link. Also, you will get notified when someone views it and see the number of times your research video has been viewed. It also allows others to interact with you according to the timeline.
I bet you probably haven’t heard of Loom.
So, give its free version a try.
Step 6. Multiply your research content
Now it’s time to start creating your research content. If you follow the previous steps, this part should be relatively easy. Simply refer to your work in step 5 and think about the channels and format of your science communication. Besides long scientific papers, other forms include:
- PowerPoint slides
- Blog post
- Quora answers
- LinkedIn post
- Pinterest infographics
- Instagram images
- Facebook / Instagram Twitter announcements
- TikTok / YouTube videos
As you’re creating your research content, keep your audience in mind and make sure that everything you include is relevant and on-point.
Once you’re finished, take a step back and review your work to make sure that it’s clear, concise, and error-free.
Note: If you don’t know how to “keep your audience in mind”, ask Jasper.AI to do it for you.
Use a command like this: >Write about ABC consent for [describe your audience]. Or, use Jasper’s “Explain it to a 5th grader” for things you know you should explain in simpler language.
Tools to help – Trinka.AI
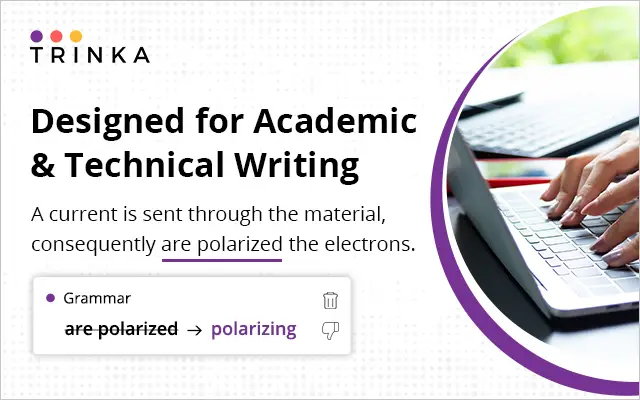
If you’re looking for a tool that can help you catch errors and improve your writing, Trinka is a great option. Trinka is an AI-powered grammar checker that can help you correct contextual spelling mistakes and advanced grammar errors. Best of all, it’s free to use. We have also written about it here.
What we like Trinka the most:
- Designed for academic and technical writers (that’s you)
- Consistency Check that’s made for scientific research
- Publication readiness check is a lifesaver for researchers (Free!)
- Flexible – credit-based pricing. Free-credits every month
Phase III. Distribution
Step 7. Distribute your research content
Bill Nye, The Science Guy, is a master at creating engaging content to increase scientific literacy.
Now that your research is finished, it’s time to get it out into the world. Depending on the channel you target, the format of your research content will vary.
If you’re writing a research article, you may need to submit it to a journal or website. If you’re giving a research presentation, you’ll need to create some PowerPoint slides. And if you’re creating a video, you’ll need to upload it to YouTube or another video-sharing site, you will just use Loom as we talked about in Step 5.
No matter what, make sure that you’re distributing your research content in the most effective way possible. If you want to reach a wide audience, consider using social media or other online platforms like we have talked about in step 7.
Step 8. Organize knowledge and learning
The next step in the process is to organize knowledge and data to retain learning from your science research project.
Why?
Because if you want to be an effective science communicator, you need to be able to find and use information quickly and easily. The best way to do this is to create a system that works for you.
It seems high-performance researchers always have information and insights at their fingertips. And, they are able to draw analogies from everyday life.
Like Albert Einstein famously said: If you can’t explain it simply, you don’t understand it well enough.
Tools to help: MeetGeek
Research teams often face the challenge of managing numerous meetings with various members, leading to a significant amount of time spent on discussing outcomes and sharing information between subgroups. This inefficiency can hinder progress and innovation within the research community.
MeetGeek is an innovative communication platform that has gained popularity in research settings for its ability to streamline collaboration and improve efficiency. Key features include:
- AI-generated Meeting Minutes: Automatically extracts highlights from meetings and compiles an email summary, saving time by reducing the need for follow-up meetings to relay information.
- Custom dictionary: Users can upload specialized terminology, ensuring accurate transcriptions even in highly specific niches.
- Seamless integration: Connects with productivity tools like Notion, Google Drive, and Slack, enabling automatic export of meeting highlights for easy sharing and access.
Overall, MeetGeek revolutionizes research communication by addressing the challenges of organizing, conducting, and documenting meetings, allowing researchers to focus more on their work and discoveries.
Tools to help: Google Drive, Evernote, and Scapple/Scrivener 3
Google Drive, Evernote, and Scapple/Scrivener are all great tools for organizing knowledge and learning.
Google Drive is a cloud-based storage service that lets you store and share files and folders. Evernote is a note-taking app that lets you capture ideas, thoughts, and to-do lists. Scapple is a mind-mapping tool that lets you create visual maps of your ideas. The same company also owns the Scrivener, which we have mentioned above as a great tool for prolific scientists.
By using one or more of these tools, you can turn messy research documents, science papers, and folders into organized knowledge and learning. And that’s the goal, after all.
Personally, I used Evernote for my university days when I had to take lots of notes. But, that was a long time ago. I now use Google Drive to digitize and organize everything. But, if I am a full-time researcher, I would probably use a specialized tool like Scrivener.
Step 9. Get feedback
The final step in the process is to get feedback and a simple survey on your research as well as your communication quality. Once you’ve delivered your content, find a way to collect feedback from your audience.
Ask questions such as: What did they like? What didn’t they like? What would they like to see more of?
By collecting this feedback, you will have a better understanding of the improvement areas of your research and/or your communication.
Check your ego. The earlier you learn your own academic strength and weaknesses, the better.
Free Tools to help – Google Forms or SurveySparrow
Google Forms and SurveySparrow are both great tools for collecting feedback on both your research as well as your communication or presentation.
Google Forms is a free online form builder that lets you create and share forms. SurveySparrow is a tool that lets you turn surveys into conversations.
I assume most people have been traumatized by Google Forms’ ugly interface and user interface. So, I will say if you haven’t tried SurveySparrow, give the free version a go.
In any case, scientists who keep a beginner’s mind and who stay curious about what their audiences find most/least useful will likely become better scientists in the long run.
By treating your research as a business (as it truly is), you will be more aware of customer needs. And, having a default survey tool in place to gauge your performance may seem like a crazy idea, it’s actually quite common among the high performers!
Final Thoughts
We believe online tools and advanced technology can help researchers communicate better. However, they are only as good as the human operators.
That’s why we created this guide. Your research communication is more determined by your understanding of your audience than their scientific literacy.
Your goal may be to increase general awareness of your research project or specific methods or insights for a specific group of researchers.
We have introduced some of our favorite tools that could enable you to communicate your research project more effectively.
We will be happy to hear from you.
What tools do you use for research communication?